Quantico star Priyanka Chopra’s Skin beauty Secret: The Ubtan

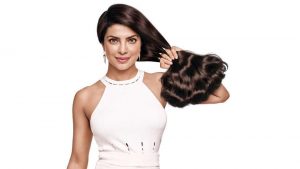
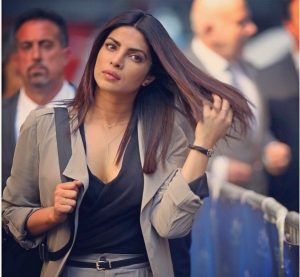
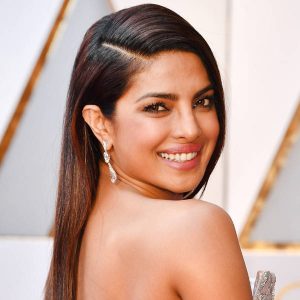
Baywatch actress Priyanka Chopra‘s skin can easily be described as flawless and gorgeous!

For quite a long time now we’ve hoping to learn what makes the beautiful actress look so bright and lively all the time and we have always been under the impression that the secret behind the beautiful skin of actresses must be expensive or luxury products. But recently, the global icon Chopra quashed this “myth” when she shared all-natural and healthy DIY Ubtan for skin.

Quantico star Priyanka Chopra's Skin beauty Secret : The Ubtan

Ubtan is a traditional Indian recipe for the nourishment and beautification of the skin. It’s a well-known beauty secret of Indian women

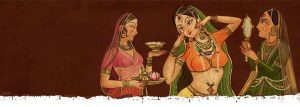
In Indian culture using ubtan has been a tradition followed since the vedic times, it was used by the queens and princesses as a pre-bath ritual, in modern times the store bought face packs and soaps have taken the place of traditional ubtan. In the present day the use of  homemade ubtan for skin glow and fairness is narrowed down to weddings only, and is used by the bride –to-be as she prepares herself to look the most beautiful on her big day.
The biggest misconception people have about this wonderful DIY is that it is restricted to pre-bridals and even grooms now. Yes, no doubt brides-to-be are conscious enough to take time out for spas and DIY recipes. But is that the only time they want that gorgeous fresh glow on their face and neglect it rest of their lives? After all, we all like to indulge in a bit of bride-like pampering every once in a while, don’t we? Everyone wants to achieve that enviable bride-like glow. Don’t wait to get married to use ubtan!

Quantico star Priyanka Chopra's Skin beauty Secret : The Ubtan

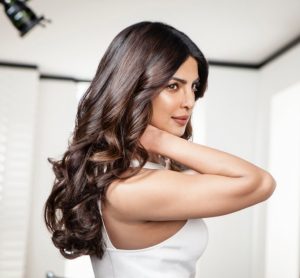
Priyanka Chopra takes an instinctual approach to beauty that focuses on healthy skin

“Women in India tend to use natural products,I’m a big believer in the fact that if you can walk out the door with no foundation, you know you’re at your beauty best.”

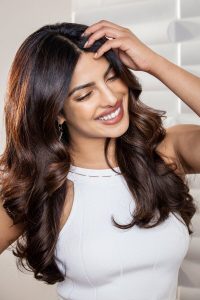
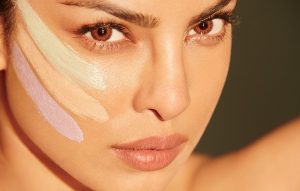
Stunning Priyanka’s Best Skin care trick to attaining a smooth and radiant skin is easy, simple, natural and definitely has no side effects whatsoever. She uses natural ingredients for her beauty concoction and gave tips on the best way to get flawless and fairer skin.
A simple yet effective DIY Ubtan, a traditional Indian beauty paste which is a good treatment to hydrate and exfoliate the skin, learned from her mother, that is completely natural and deeply rooted in her heritage.

Quantico star Priyanka Chopra's Skin beauty Secret : The Ubtan

“This has been taught to us by our mums and our grand-mums,”
“The ubtan was my mum’s way of moisturizing, exfoliating my skin when I was 16,”.“It really soothes and leaves my skin more luminous and hydrated—I’ve taught it to a lot of my friends.”

The best part of this DIY home-made goodness is that the ingredients are right there in our kitchen. All we need to know is how to use these hidden treasures for luminous and poreless look. Her gorgeous glow is more accessible than you might think.
The ubtan recipe given below doesn’t require any expertise, can be efficiently and easily prepared & stored, you can make it in small batches and use them once or twice a week.

Ubtan, a recipe for radiance : get glowing skin in no time!

You will need:

  • Gram flour – ½ tbsp
  • Turmeric – ½ tsp (the secret ingredient)
  • Yoghurt – 1 tsp
  • Honey – 1 tsp (use organic one)
  • Lemon juice   – 1 tsp
  • Sandalwood powder-– 1 tsp (for some extra goodness)
  • Water or Rose water

Directions:

  1. Take a clean bowl and add all the ingredients in the measurements given above to the bowl.
  2. Mix all these together to make a smooth paste. It shouldn’t be too thick to apply nor too watery. If your paste turns out to be dry, you can add some milk into it.
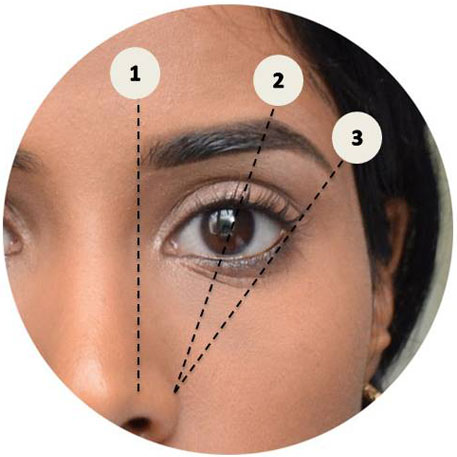
  3. Apply the paste evenly all over your face and leave it on till it dries. Make sure you avoid your eyebrows, eyes and lips while application.
  4. Rub in a circular motion in opposite direction of your unwanted hair growth when your skin starts stretching after 20-25 minutes.
  5. Wash it off with luke warm water.

Turmeric powder, the Secret Ingredient

World’s second most beautiful woman, Priyanka Chopra uses her ‘favorite ingredient’, the turmeric to help boost her glow.

Quantico star Priyanka Chopra's Skin beauty Secret : The Ubtan
Due to anti-inflammatory and antioxidants found in it, turmeric helps to treat inflammation and puffiness on the skin. It works as an excellent skin-lightening ingredient, which promises to give you a soft and glowing skin. It helps to soothe the burns and also eliminate acne scars from the face. It is very effective in improving the condition of the skin.

Quantico star Priyanka Chopra's Skin beauty Secret : The Ubtan
“this is like an Indian trick. The turmeric is a healer for your skin.”
“In India, people love turmeric. They make turmeric milk, and sometimes I mix it with some cream or yogurt and turn it into a scrub. You’d be amazed at what it can take off your skin.”

It’s no wonder that Priyanka Chopra looks gorgeous, thanks to the healing wonder of turmeric. It doesn’t matter if she’s with or without make-up. Whatever she dons on her body, her great skin is always her best accessory.

Kaatru Veliyidai’s actress Aditi Rao Hydari secret behind her glowing skin is also Ubtan

Aditi Rao Hydari who is constantly plagued with questions on the secret behind her luminous and flawless skin , reveals that a simple childhood regime can be completely credited for it.

Kaatru Veliyidai's actress Aditi Rao Hydari secret behind her glowing skin is Ubtan

“Mom would have a lady come in every week and apply an ubtan with gram flour, milk, oil and turmeric on my skin. I owe my healthy skin to that regime as a child. I don’t do that often, but the skin regime and nutrition you follow as a kid is something that stands by you — at least that’s what I’ve seen! “

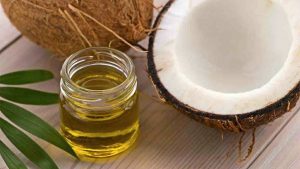
Apart from following her mother’s beauty routine, the actress drinks a lot of coconut water through the day to retain the suppleness of her skin.

Organic and natural beauty recipes are gaining their glory back

A lot of women are now returning to the roots and have started showing interest in herbal and homemade preparations. Although the market is full with Herbal and Ayurvedic products but many of those contain preservatives which means they are not 100% chemical free.
Ubtans are natural skin cleansers that are suitable for sensitive skin types and since they have been used since generations, their credibility cannot be doubted.

Isn’t it totally cool?  We often ignore some really simple and easy home remedies which can do wonders to our skin.
However, for this ubtan to really work well, you’ll need to prepare your skin first. Remember, any mask will only work to slough off the dead skin cells and impurities; but, it is what you put inside your body that would eventually show results. So, say no to binge eating today. Chug down wholesome fruit and vegetable juices to flush out the toxins from your body. Stop touching your face, never pop a pimple and the golden rule, drink enough water.

An Ubtan, no doubt, is a miracle DIY for our skin

The recipe is just too simple and easy to make. The ingredients too are natural, toxic free, skin-safe and easily available.
A trusted and efficient method of maintaining that beauty in spite of the daily stress, sun tan and pollution.
Ubtan is our all time beauty companion, for any time at any place.
So, now you know the easiest way to get flawless glow, spotless and pimple free skin. I am surely going to include an Ubtan in my weekly beauty regime. What about you?

Multiple beauty benefits of Ubtan

Ubtan is a natural exfoliant, cleanser and astringent that promises guaranteed results : a beautiful & glowing skin.
Skin that is free of blemishes, dark spots, fine lines and unsightly patches may sound more like a dream to many. What if I say all that is possible by using this magical beauty homemade mask for a radiant and clear skin. It helps also to lighten your skin, remove dead skin cells and ward off the skin issues like whiteheads, blackheads etc.
Summer sun given you a tan you can’t get rid of? Use ubtan! Have too much hair on your face and body? Use ubtan! Need to soothe the skin and keep acne and pimples at bay? Use ubtan! It is probably the first cosmetic ever to be used for skin care regime. Ubtan has been passed on for generations as a beauty secret, so much that it no longer remains a secret!

Lightens The Complexion
Ubtan lightens the complexion and makes the skin bright and glowy. It opens the skin pores and exfoliates the skin.Usually, lemon juice, milk, and turmeric are used for making ubtan. Lemon is also known as a natural bleach, and hence it would be right to say that it lightens the skin without any harmful effects.

Reduces facial hair growth
Many Indian women swear by ubtan as it helps in reducing hair growth. The paste when applied in circular motion helps make the hair weaker from the roots and eventually leads to a finer growth. Though it may take months to see visible results, it is still worth the effort as it will not harm your skin. Many add ground red lentil and also orange peel powder for further enhancing its effects. If the paste does not come off easily with water, one can rub olive oil on the area. Don’t irritate the skin by rubbing too hard.

Reduces Marks, Warts, Blemishes
Ubtan being a natural substance can reduce the marks, spots, and blemishes with no side effects. With no side effects and different compositions, this natural remedy can give you the pre-wedding glow that you have been craving so badly.

Makes The Skin Soft
As mentioned above, ubtan is made from completely natural and nutrient rich ingredients. It is manufactured from the natural products such as Besan, lemon, etc. Besan or gram flour can be used to exfoliate the skin and thus remove all the dark patches and blackheads. Sandalwood can be used to soothe the skin and remove the heat.

Brings The Childish Suppleness Back
Regular use of ubtan can significantly affect and improve the skin texture. While using ubtan, it is usually suggested that applying the paste in a circular motion, will significantly reduce the hair growth and make the skin soft and supple.

Clears The Skin
Ubtan is known for visibly reducing acne scars, marks, pigmentation, etc which are often found on sun-damaged skin. For faster results, you can mix a few drops of lime juice in it as it has bleaching properties. This makes it all the more effective. Using it even weekly once is good enough to give you flawless skin. But make sure you also protect your skin from the sun by applying sunscreen.
Due to antibacterial properties found in rose water, it helps to fight against acne and eczema on the skin. It helps to keep your skin smooth and moist throughout the day. Rose water is extremely beneficial in rejuvenating your skin and giving it a natural glow.

Prevents ageing of skin
Who likes to see wrinkles and lines on their face? And ubtan can help prevent them. Turmeric has anti-ageing, anti-oxidative and anti-inflammatory properties which can keep wrinkles at bay. The combination of other ingredients further makes it a strong anti-ageing potion which when applied on the skin not only repairs it but prevent damage as well. White sandalwood powder is commonly used to get a flawless and brighter skin tone. It helps to treat various kinds of skin problems, including acne, wrinkles, pimples, etc. It also helps in reversing the signs of ageing on the skin.

Adds a natural glow to the skin
Applying ubtan regularly can help get rid of the tan you’ve accumulated over the years and get a good glow in it. Besan has exfoliating properties which helps get rid of dead skin cells which give the skin a dull appearance. Sandalwood soothes the skin especially during the summer months. And the addition of milk further enhances the complexion.

10 Latest Hair Hacks for Stronger, Thicker and Healthier Hair

At this time of year your hair will face extremes of weather changes, as going from the cold outdoors to centrally-heated rooms means the moisture content in the air changes, causing the protein bonds in your hair to expand and contract leading to dry, brittle and frizzy hair.
Thunder, snow, and frigid windchills may ruin your day, but your hair will be safe. Here are 10 latest hair hacks for stronger, thicker and healthier hair.

Priyanka chopra with stronger, thicker and healthier hair - latest hair hacks

” A good head of hair can be a real confidence booster. Ever notice how when you have a good hair day, it makes you feel so much better about yourself. Good hair days are a direct result of great choices when it comes to your hair care routine.”

1. Your Old T-Shirt Will Dry Your Hair Way Better Than a Towel

A bath towel’s fuzzy fibres are superb for sloughing off dead skin and wicking water off your face and body. However, the friction created by those very same fibres can result in frizz and split ends.
A soft cotton T-shirt’s tightly woven “grain” wicks away water without aggravating hair cuticles. That means it soaks up moisture without messing with your hair texture.

2. The Power of the Silk Pillowcase

The one thing you didn’t know was making your hair frizzy. Even worse, you sleep with it every single night.
Cotton absorbs moisture, while silk retains it, so when you lie on a silk or satin pillowcase, the oils from your strands are maintained rather than soaked up, leaving your hair nourished rather than dry.
Sleeping on a silk pillow makes your blow-dry last longer and tames frizz, too. The natural properties of silk, including the less static can help reduce friction in hair and thereby reduce hair damage, such as split ends. So you can wake up looking flawless like in the movies. The hair is visibly smoother, shinier, feels softer and is waving more evenly.

Priyanka chopra with stronger, thicker and healthier hair -latest hair hacks

3. Swap Your Shower Routine and Condition Before You Shampoo

This simple switch can do wonders for your hair. this method helps your hair not get weighed down by shampoo, which allows it to have more texture, volume and nourishment. The shampoo works to whisk away any excess conditioner that may cause your hair to look greasy or flat. Switching your hair cleaning routine is especially helpful for people with fine, damaged, knotty, thin, greasy, or highlighted hair.
An important thing to remember when conditioning the hair is to only apply the product halfway down your hair and never to the scalp.
And for more volume, turn your head upside down when blow-drying to give it a natural boost.

4. Use Eyeshadow to give the Illusion of a Thicker Hairline

Eye shadow isn’t just for your eyelids, Create the illusion of having a fuller head of hair with a little tinted powder and a small blending brush.
Applying the make up to the roots can boost volume and camouflage any regrowth. This hack works without breaking the bank.
Find an eyeshadow that matches your hair colour and start blending into the roots of your hair. The eyeshadow will make your parting appear a lot thinning, in turn giving the appearance of thicker, fuller hair.

Nayanthara with stronger, thicker and healthier hair - latest hair hacks

5. Add a Spoonful of Sugar to Your Moisturising Shampoo every Four Washes

It turns out that this basic kitchen staple may hold the key to finally getting rid of your dryness and dandruff.
Scrubbing your hair with sugar-infused shampoo will better remove dead skin cells for a deeper wash, and will therefore allow your conditioner to moisturize your locks more thoroughly.
Adding a tablespoon of sugar to a dollop of shampoo will gently exfoliate the scalp easily dissolve and rinse out without leaving any residue on hair and promotes healthier hair. So you’re getting a deeper clean and better moisture, all at the same time.

6. Never Comb Wet Hair

The worst thing you can do with your hair is combing them when they are wet. In this condition, the hair is more exposed to the external factors, including negative ones, and as a result, they can be easily broken.

Priyanka chopra with stronger, thicker and healthier hair - latest hair hacks

“Having thick and strong hair makes me feel fantastic…”

7. Massage Your Scalp

At least 2 times per day. This stimulates blood circulation in the scalp, nourishing hair roots and thus promotes the growth of the latter.
Movement of the fingers should not be too fast, but gentle and strong enough. Duration of massage – 30-60 seconds. The result of this regular self-massage is a faster hair growth. You will notice a difference in 4-6 weeks.
A great option is a massage of the scalp with the addition of warm vegetable oil. Due to it, hair becomes thick and silky. Argan oil is great to use during the cold months as it not only moisturises the hair instantly but it also adds nutrients to your scalp combating dandruff, which is more prone at this time of year.

8. Drink 8 Glasses of Water a Day

It is not just about the products you put on your hair. Eat healthily and drink 8 cups of water a day and you will not only add benefits to the overall health and vitality itself but also make your hair stronger.

Priyanka chopra in Baywatch with stronger, thicker and healthier hair - latest hair hacks

9. Shampoo your Hair only Twice a Week

You should shampoo your hair only twice a week, three at the very most. If you’re feeling brave, blast your hair with cold water at the end of your shower. It has long been claimed to reduce frizz and to get some extra shine in your locks!

10. Benefits of Sleeping in a Braid

Beachy heatless Waves without going to the beach.
This is one of the best ways to curl your hair in a timely and efficient fashion. Braid your dampish-dry hair at night. Big braid for bigger waves and smaller braids for a tighter curl in the morning. Not only will you wake up fabulous, but some also say that it makes your hair grow faster!


Easy Galette des Rois, the French King Cake

Galette des Rois, the French King Cake

The Galette des Rois, France’s answer to post-Christmas blues!

Who will become king or queen for the day at your house? Bake This yummy french king cake and have fun with the family & friends!

Traditionally, the galette des rois is made to celebrate Epiphany, which falls on the 6th of January, twelve days after Christmas. The cake is eaten in celebration of the arrival of the three kings who have traveled from afar with gifts for the newborn baby. But I won’t tell if you make the cake another time of the year!

The traditional galette is cut in a very specific number of slices: one slice for each person sitting at the table plus one. The extra slice is symbolic for the first poor person passing by.

The youngest person in the room (the most innocent one and therefore fair in the distribution of the slices) goes under the table, and announces who gets each slice.

The person with the fève in the slice is crowned king or queen for the day, names their king or queen and gets the figurine as a keepsake. If a grownup wins the prize, it’s down to them to buy the next galette, like a game of tag with cakes.

Fève” (pronounced “fev”) literally means a dried bean which was historically baked into the cake.
But by the late 19th-century the beans were replaced by porcelain figurines, some of which have become highly collectable.

If you decide to hide a fève in your king cake, don’t forget to let your guests know before they begin to eat.

The French president is not allowed to “draw the kings” on Epiphany because of the etiquette rules. Therefore, a traditional galette without figurine or crown is served at Elysée Palace.

Ingredients

  • Puff pastry – 2 rolls
  • Sugar – 75g
  • Almond powder – 100g
  • Softened butter – 50g
  • Egg – 2 (1 for painting)
  • Almond extract – few drops
  • Fève – 1
  • Golden paper crown – 1

Instructions

  1. Preheat oven to 356°F.
  2. Remove from the fridge your puff pastry and let it rest a little while at room temperature.
  3. Meanwhile, in a bowl combine the sugar, the almond powder, the softened butter, one egg, and the almond extract. Mix with a wooden spoon or a spatula until well combined.
  4. Unroll your two puff pastry discs. Use a fork to make several small holes all the way through the first pastry.
  5. Spread the almond cream evenly over the center of the pastry leaving about 2 inches of space from the edge.
  6. Place your lucky charm somewhere close to the outer edge and press it down into the filling.
  7. Place the second sheet of puff pastry over the cream pushing gently together the edges to seal them tight.
  8. Brush the whole surface with the beaten egg.
  9. With the tip of a sharp knife, gently draw criss-cross lines (without cutting it!) and pierce the pastry at their intersections to allow the steam to escape.
  10. Bake at 356°F for about 40 minutes or until golden brown.

Eat this deliciously cake with cider while still warm to enjoy the filling and the aromas at their best. La galette des rois, the only sociable cake that can make you feel like a king.

How to make Moringa/Drumstick/Murungakkai Sambar

Moringa Drumstick Murungakkai Sambar

Moringa is chock-full of nutrients but we don’t pay much attention to this miracle tree.

Moringa is also the botanical name (Moringa Oleifera) for drumstick. While it grows in most parts of India, it’s probably more ubiquitous in Southern India.
We call the drumstick leaves as Murungai Keerai  and the drumstick tree as Murungai maram in Tamil.
The world might have put Moringa on the pedestal as the newest and greatest superfood but across South India it has been an integral part of the diet for years.
Lately, Moringa supplements and energy bars are becoming fashionable. All the excitement is understandable: Moringa leaves and seed pods are packed with protein and vitamins.
The leaves, which taste a bit peppery, like arugula, are a good source of easily digestible protein as well as vitamins A and C, calcium and iron. The seed pods are also rich in protein and high in omega-3 fatty acids.
Recently, researchers around the world have taken a renewed interest in this hardy plant and its many nutritional benefits. And they’re learning that all that moringa I gorged on as a child might have been healthier than I ever realized.
Africans have also honoured it as a tree to “Never Die” and “Mother’s Milk”.

Sambar is a quintessential part of lunch in Tamil cuisine

Sambar is a very healthy dish, a complete meal in itself with vegetables and protein from dal.
Drumstick or murungakkai is the most favored vegetable in sambar in Tamilnadu. Drumstick is a very healthy and flavorful vegetable, often recommended in diet to increase iron. It lends a subtle yet fragrant flavour to the sambar. The juicy seeds taste like green beans but sweeter. And most often kids are encouraged to chew on the drumsticks to max out on the nutrients.

Easy & Quick Sambar Recipe, How to make Moringa/Drumstick/Murungakkai Sambar.
Ingredients for Moringa Sambar

  • Tuvar dal/pigeon pea lentils – 50g  pressure cooked until the dal becomes soft
  • Tamarind juice, extracted from a small lemon-sized ball of tamarind soaked in hot water
  • Drumstick- 2, chopped into finger-sized pieces
  • Tomato – 1, chopped
  • Turmeric powder – ¼ tsp
  • Sambar powder – 1 tsp
  • Salt to taste
  • Oil -2 tbsp
  • Onion – ½, sliced finely
  • Water – 1 cup
  • Water for pressure cooking the dal –  ratio 3 : 1

For the tempering

  • Oil – 1 tsp
  • Mustard seeds – ½  tsp
  • Fenugreek seeds (optional) – ¼ tsp
  • Asafoetida – a pinch
  • Curry leaves – few

For the garnishing

  • Coriander leaves

Instructions

  1. First soak the tamarind in  warm water. After 30 minutes, squeeze off the tamarind well, then filter the tamarind juice.
  2. Wash and chop the drumsticks.
  3. Rinse the tuvar dal thoroughly and drain out the water.
  4. Pressure cook the dal with water, turmeric powder and salt on medium flame for 2 to 3 whistles. The dal should become soft and mushy. Once the pressure settles down on its own, remove the lid, mash the dal to smooth using a wooden spoon and keep aside.
  5. Heat the oil in another saucepan, then allow to cook on a medium flame the onion for 30 seconds, and the tomato until it turns into a mushy texture while stirring occasionally.
  6. Add the choppped drumsticks, stir about 1 minute then add the sambar powder, mix well for another 1 minute. Add water and let it boil till the drumsticks are half cooked for 10 minutes.
  7. Now add the tamarind juice and salt and cook till the drumsticks become tender for another 10 minutes.
  8. Add the smooth boiled tuvar dal. If the consistency of sambar is thick, then add some water.
  9. Check if there is enough salt, if needed add more.
  10. Bring the sambar to boil. Meanwhile heat the oil in a small pan. Put the mustard seeds, once the seeds crackle turn the heat on low flame, then add fenugreek seeds, asafoetida powder and curry leaves.
  11. Pour the whole tempering in the boiling hot sambar. Mix well and close the lid so the flavors can infuse.
  12. Garnish with coriander leaves.

Serve your drumstick sambar with steamed rice, ghee, potato fry, small potato fry, raw banana fry, carrot curry etc. Add curd, pickle and your meal will be a complete and healthy one!

Tips

For faster cooking you can soak the lentils in water for 15 mins before cooking them.
Dont overcook the dal, as the taste of it diminishes.
Try to use tender drumsticks that contain more plump.
Pearl onions or small onions take the flavor of this drumstick sambar to another level

Health benefits

Drumstick tree botanically known as “Moringa Oleifera” offers many health benefits. Drumstick leaves are a storehouse of nutrients and antioxidants. It has approximately 90 nutrients and 46 natural antioxidants as well as anti-inflammatory compounds. It has all the essential amino acids needed for the body and is said to treat more than 300 diseases. No wonder it is called the “Miracle Tree”. Moringa has been found as a potent anti-diabetic and anticancer plant and several bio active compounds with significant anti tumor activity have been discovered from Moringa. It is also a good sources of minerals like calcium, iron, copper, manganese, zinc, selenium, and magnesium. It helps boost the immune system and increases breast milk production

You can find more informations here


How to Make Indian Milk Tea

With cooler weather coming, warmer beverages sound better every day, there’s nothing like a cup of indian milk tea to relax you.

 Indian Milk Tea

Simple and easy way to make your perfect cup of indian tea.

Ingredients for 1 cup

  • 100 mls low fat milk
  • 100 mls water + 2-3 tsp extra water
  • 4 lipton Yellow Label Tea Bags
  • 2 tsp sugar

Instructions

  1. Add the sugar in your tea cup and place the tea strainer on top.
  2. Cut out the tea bags and set aside the powdered tea leaf.
  3. Heat the milk and the water in a saucepan until you see bubbles on the sides. A thin layer of cream will form on the surface of the milk.
  4. Add the tea leaf powder in the center, thereby break the film of cream and allow the milk to bubble over.
  5. Stir till you get the desired color for your tea.
  6. Strain through a tea strainer from a good height right into the cup. The tea will become more bubbly.
  7. Then pour from the cup into a clean saucepan and then back into the cup. Perform this 3 times as high as possible. It improves the flavors of the tea.
Blue-eyed Indian Milk Tea-seller becomes social media sensation in India and Pakistan
Blue-eyed Tea-seller becomes social media sensation in India and Pakistan

Savor your silky & creamy indian milk tea hot with cookies/biscuits or some indian snacks!

Totally Her Cup of Indian Milk Tea: 26-Year-Old Indian ‘Chai Walli’ Is Australia’s Businesswoman of the Year
Totally Her Cup of Tea: 26-Year-Old Indian ‘Chai Walli’ Is Australia’s Businesswoman of the Year

Whether it’s a happy occasion or a difficult moment, tea is a sweet & spicy way of bringing people together.

first lady Michelle Obama meets with Melania Trump for tea in the yellow oval room of the white house
First Lady Michelle Obama meets with Melania Trump for tea in the yellow oval room of the white house


Health Benefits

Black tea has weight loss aiding abilities. It helps controlling blood sugar levels and curbs the appetite to a great extent.
Tea is associated with a lower risk of developing ovarian cancer.

You can find more informations here


ZARA Short Red Checked Shirt

A checked shirt is a classic look and one that’s been around for ages.

Zara Short Red Checked Shirt

It’s easy to style, flattering, wearable for day or night and has a cool, laid-back cowgirl vibe around it too.

Zara Short Red Checked Shirt

Plaid is a great fall trend to try, it’s warm, cozy and soft, a great buy for autumn.

Zara Short Red Checked Shirt

With this red checked shirt, you’ll easily achieve an enviable model-off-duty ensemble and dominate fall in serious style!

ZARA Short checked shirt

How to make Saffron & Almond Milk

Saffron & Almond milk is a rejuvenating and flavourful drink which is served on various Indian occasions like weddings and festivals. Saffron & Almond milk is enriched in nutrients and very energetic. This is a very good recipe for kids as almonds are said to have properties to increase memory power.

Saffron & Almond Milk
Quick & Easy Saffron & Almond Milk that can be made at home

Ingredients for Saffron & Almond Milk

  • Full Cream Milk – 500 ml
  • Almonds – 5
  • Pistachios – 5 + (3 crushed for garnishing(Optional))
  • Cashews – 1
  • Cardamom – 2 (open and take out the seeds)
  • Saffron – 2 pinch
  • Sugar – 6 tsp (can be substituted for coconut sugar or honey)

Instructions

  1. Chop few pistachios and keep aside for final garnishing.
  2. Put all the ingredients except the sugar and saffron to the mixer and grind it until it becomes a fine powder.
  3. In a medium saucepan, bring the milk to a boil, add saffron and sugar.
  4. Reduce the heat to low, Keep stirring for about 3 minutes, in order to avoid sticking the milk at the bottom of saucepan.
  5. Add the powder to the milk and simmer on low heat for another 3 minutes until all the ingredients are well combined.
  6. Turn off the heat  and allow the drink to cool to the room temperature. You can either serve it warm or serve it chilled by keeping it in the refrigerator for 4 hours.
  7. Serve garnished with the thinly sliced pistachios and enjoy this healthy and tasty Saffron & Almond milk!

The result is a sumptuous beverage laced with warm spices that has nutty undertones and a delicate sweetness from the saffron and sugar.

Health benefits

  • Saffron has many medicinal properties, it is effective at treating mild to moderate depression, it also helps in asthma, sleeping habits and many more.
  • Almonds are super nuts for health. It is said that these crunchy and delicious nuts can help you lose weight, protect your heart, increase your energy and even improve your skin tone.
  • Pistachios can maintain the cholesterol level in the body and improve the overall health.
  • Milk provides calcium, phosphorous, magnesium and protein which are all essential for healthy bone growth and development of body.

All these ingredients makes the drink very rich and refreshing. This delicious & nourishing drink makes you forget that you are drinking milk!

HEALTH BENEFITS OF ALMONDS

How To Get Thick & Bold Eyebrows

Nayanthara with thick and bold eyebrows in Kaashmora

Good looking eyebrows enhance your beauty

As much as you would care for your skin, eyes and hair, taking care of your eyebrows is equally important.

Right now, it’s all about a lighter, natural-looking, full brow.
But this natural brow poses significant challenges. It’s very difficult to achieve fullness without going in hard on the eyebrow pencil and falling into “Scouse Brow” that ultra-dark, fake-looking eyebrow that looks like you drew it on with a magic marker.
In order to achieve a natural-looking, realistic brow, you’ve got go deeper at the base of the hair and taper off at the tip to have the stroke look just like a real hair does.

How brows became the beauty obsession of the decade

Deepika Padukone, Priyanka chopra, Cara Delevingne and Nayanthara are sporting thick arches and have heralded a trend amongst youngsters waving goodbye to their tweezers.
Their eyebrows are full, thick and a perfect arch lending a charisma, making their face look chiseled, instantly drawing your attention to their  eyes.

Deepika Padukone with thin eyebrows  Deepika Padukone with bold eyebrows

On the left is Deepika Padukone with her thin and natural eyebrows whereas on the right, she’s with her thicker and fuller, perfectly groomed bold eyebrows, taking away few years and adding freshness to her face.

Priyanka Chopra with thin eyebrows  Priyanka Chopra with thick eyebrows

Pencil-thin eyebrows are out. By thinning the eyebrows you take away the defining characteristics of your face such as your eyes, mouth and forehead. The way Priyanka Chopra shapes her brows, changes her look.

Nayanthara with thin eyebrows  Nayanthara with bold eyebrows

Nayanthara realized that the brow trend turned. It became not just about boldness, but fullness and bushiness, too. Now, not only is this less painful, but it also gives the face a more natural look. So, feel free to skip your next threading appointment and enjoy the beauty of your vagrant eyebrows!

How to shape your brows

presentation1

  1. Place your brow tool vertically alongside the outer edge of the bottom of your nose: this is where your brow should begin (about one inch above the inner corner of your eye, avoid tweezing this area too much; it will result in an unnatural rounded appearance. A few stray hairs here is good).
  2. The highest part of your arch should be above the outer rim of your iris and lie right on your brow bone.
  3. Place your brow tool in a diagonal between the bottom of your nose and the outer corner of your eye: this is where your brow should end.

1

How to get the full brow

Filling In

Always make sure to fill in your brows while positioning yourself at least a few feet away from the mirror because if you start close up, things can get crazy-looking. This is all about supporting the natural shape of your brows with natural-looking powder and pencil.

2

  • The goal is to have even, fuller brows and avoid making end points too harsh. Never choose a shade that matches your brow hair, choose to go a bit lighter always!
    So if you have black eyebrows, use taupe or dark brown shadow.
  • Create a thicker brow appearance by first filling them in with a pomade like the Anastasia Beverly Hills Dipbrow Pomade ($18) using a brow brush or an angled eyeshadow brush. Then, use an eyeliner pointer brush, starting at the base of the brow, to outline the shape by brushing product throughout the brow and in an upward direction. Continue filling in through the base and mid-length of the brow until you reach the desired thickness.
  • The result is much softer with powder but if you choose to use pencil, go for one that’s powdery in texture and not waxy and fill it in using small light strokes, one over the other, just the way your eyebrow hair looks. Remember to keep a light hand when doing this.

Disperse the Product

  • Blending is an essential step for creating natural-looking brows.Unless you want your brows to look ultradark (and semi-fake), this step is vital.
  • Use a spoolie like the brilliant one from Kiko Cosmetics to disperse and brush out the products throughout the brows. You need a spoolie because you have to go heavy on the product to build thickness during the first step, so this will actually help spread the product and soften any harsh lines throughout the brows for a more natural look.
  • Gently brush from bottom to top, upward & outward to evenly diffuse product and to groom hairs into place.

3

Accentuate your edges

  • Once you’ve filled in your eyebrows a small concealer brush with some concealer, will clean up any smudges and will make the edges appear sharp and clean.
  • Apply the concealer below your eyebrows and blend it well with your skin.

Keep the hairs in place for the final look

4

  • Set your work with a brow gel or clear mascara to keep everything in place.
  • If you don’t have a brow gel, you can grease your damp spoolie into a clear soap. Tame your brow hairs exactly how you want them to go, for #OnFleek brows that will last.
  • Brush the hairs up and out in the direction of your arch to keep the hairs in place and set them higher than they would usually fall.
  • To accentuate the appearance of an exaggerated arch, place a highlighter product with neutral tones under the brow bone. By layering on this light-reflecting formula, you’ll be able to fake the appearance of a dramatic arch without having to pluck away any extra hairs beforehand.

Eyebrows can really transform  the way you look by instantly opening up your eyes. See for yourself, what a difference eyebrows make!

Eyebrows are about POWER and SELF-DEFINITION.

Tips & Tricks for #OnFleek brows

  • Eyebrows should be sisters not twins. Don’t stress yourself out trying to make them look identical. It’s impossible!
  • If your skin and scalp are not healthy, it will reflect on your eyebrows too. They could appear thinner. So, eat a well balanced diet. Make sure your scalp is dandruff-free and your skin healthy.
  • Leave your brows alone, do not pluck, thread or brush them for a few weeks.
  • Maintain a gap between your brows, you don’t want a thick unibrow now like artist Frida Kahlo’s, do you?
  • If you have close-set eyes, make sure that your brows aren’t too short from the tail. While those with wide-set eyes should ensure that they leave more hair in the inner parts of their brows.
  • Apply an astringent or skin tonic before and after plucking the brows to soothe the skin and avoid bumps.
  • Castor oil is one of the most effective remedies to boost the growth of your eyebrows. It contains protein, vitamins, fatty acids and antioxidants that nourish the hair follicles and help with hair growth. Plus, it is helpful in resisting any microorganisms that hamper eyebrow hair growth.Soak a cotton ball with castor oil with vitamin E oil, and apply it on to your eyebrows and massage it on the area for a couple of minutes. For the best result keep it overnight and repeat daily for a month. Your brows will grow faster, leading the way to a fuller look.
  • Once you’ve found your desired brow shape and mastered the art of filling them in, maintain the look by only tweezing in the areas outside the shape.

Embracing your natural beauty is the most important thing about your look. Rock with what you’ve got. Your original shape usually suits your face the best!

Simple and healthy Vegetable Rava Upma

You are looking for something simple and healthy? Timeless and delicious? Vegetable Rava Upma is just the ticket for you. Take your senses for a gastronomical joy ride!

Vegetable Rava Upma

Semolina or popularly called rava in the Southern states of India, is cooked with much enthusiasm across the country. It is light on stomach, loaded with health benefits and absolutely delectable.

The tempering of mustard seeds, chillies, urad dal and curry leaves works miraculously in transforming the simple dish to a delightful treat.

Add some onions and chopped vegetables to the savory semolina upma, and you have a power-packed, as well as delicious, meal in a bowl!

Ingredients for Vegetable Rava Upma

  • 1 cup Rava (Semolina)
  • 2 cups Water
  • 2 Tbsp Oil
  • 1 medium-sized Onion (chopped)
  • ½ cup of frozen Green Peas
  • 1 medium Carrot, chopped
  • 5 Curry Leaves
  • ½ Green Chili, slitted
  • ½ tsp split Urad Dal
  • ½ tsp Mustard Seeds
  • ½ tsp Salt
  • ¼ tsp Turmeric Powder
  • ½ inch of fresh, peeled and shredded Ginger (If you don’t have, you can replace it by ¼ tsp of ginger garlic paste)

Instructions

  1. Dry-roast semolina (rava) until the color starts changing, then keep aside.
  2. In a large saucepan, heat the cooking oil. Add mustard seeds and wait for them to sputter. Reduce the flame, then add curry leaves, slit green chili, ginger and split urad dal.
  3. When the dal turn golden brown, add chopped onion and fry until it becomes translucent.
  4. Add the chopped vegetables, salt to taste, turmeric powder, mix well and sauté for 2-3 minutes.
  5. Add 2 cups of water to the vegetable mixture and let it come to a boil.
  6. Taste the water and check for salt.(if it is a bit salty, then it will become perfect after adding rava).
  7. Add roasted rava to boiling water slowly while stirring continuously the mixture to avoid lumps.
  8. Cover and cook on medium flame for 5 minutes. The rava is cooked when all the water is absorbed.

If you want the upma on tangy side, you can add lemon juice or yogurt towards the end.
And for that added crunch, spruce it up with a few cashew nuts or roasted peanuts and you’re good to go.

This tasty traditional breakfast dish can be a colourful, light and nutritious lunch or dinner.
It’s a 10-minutes flavorful snack. So easy to make and wonderful to experiment with!

The reason why upma is so important today

Health benefits

  1. It Digests Slowly: Your body digests upma slowly. This is an advantage as it will keep you full for long. So, you don’t need to snack on anything else.
  2. Good For Immunity: The vitamins present in wheat rava are good for your immunity. Mainly, Vitamin B and E in it fortify your immune system.
  3. Keeps You Energetic: Even health experts agree that upma can keep you energetic. Also, when you add enough vegetables to it, you can get some fibre content too.
  4. Good For Kidneys: The potassium content present in wheat rava is good for your kidneys. In fact, it enhances the function of your kidneys.
  5. Good For Your Heart: The nutrients present in wheat rava are heart healthy. Also, the selenium content in it is said to be good for your immune system.
  6. Vegetables: Generally onions are added to upma.You can also add green peas and any other vegetables to it. This helps you get lots of vitamins and minerals in your diet. This makes upma nutritious.
  7. Good For Bones: Minerals like magnesium, phosphorous and zinc present in wheat rava are good for your nervous system and bones too.
  8. Good Source Of Iron: As wheat rava is a good source of iron, it can prevent anemia. Also, it enhances your blood circulation.
  9. Nuts: You can add various types of nuts like ground nuts and cashew nuts in upma. This will make it tastier and of course, you can reap the health benefits of the nuts too.