Category: Food

Easy Galette des Rois, the French King Cake

Galette des Rois, the French King Cake

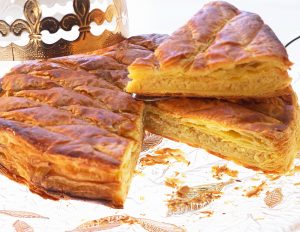
The Galette des Rois, France’s answer to post-Christmas blues!

Who will become king or queen for the day at your house? Bake This yummy french king cake and have fun with the family & friends!

Traditionally, the galette des rois is made to celebrate Epiphany, which falls on the 6th of January, twelve days after Christmas. The cake is eaten in celebration of the arrival of the three kings who have traveled from afar with gifts for the newborn baby. But I won’t tell if you make the cake another time of the year!

The traditional galette is cut in a very specific number of slices: one slice for each person sitting at the table plus one. The extra slice is symbolic for the first poor person passing by.

The youngest person in the room (the most innocent one and therefore fair in the distribution of the slices) goes under the table, and announces who gets each slice.

The person with the fève in the slice is crowned king or queen for the day, names their king or queen and gets the figurine as a keepsake. If a grownup wins the prize, it’s down to them to buy the next galette, like a game of tag with cakes.

Fève” (pronounced “fev”) literally means a dried bean which was historically baked into the cake.
But by the late 19th-century the beans were replaced by porcelain figurines, some of which have become highly collectable.

If you decide to hide a fève in your king cake, don’t forget to let your guests know before they begin to eat.

The French president is not allowed to “draw the kings” on Epiphany because of the etiquette rules. Therefore, a traditional galette without figurine or crown is served at Elysée Palace.

Ingredients

  • Puff pastry – 2 rolls
  • Sugar – 75g
  • Almond powder – 100g
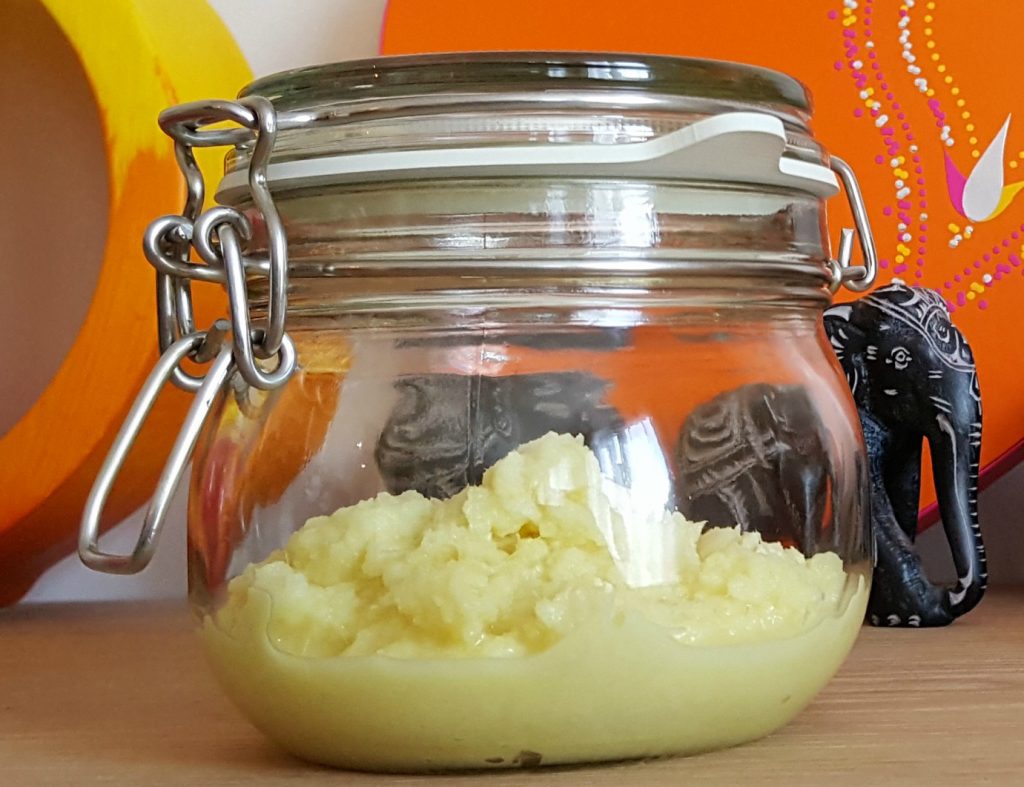
  • Softened butter – 50g
  • Egg – 2 (1 for painting)
  • Almond extract – few drops
  • Fève – 1
  • Golden paper crown – 1

Instructions

  1. Preheat oven to 356°F.
  2. Remove from the fridge your puff pastry and let it rest a little while at room temperature.
  3. Meanwhile, in a bowl combine the sugar, the almond powder, the softened butter, one egg, and the almond extract. Mix with a wooden spoon or a spatula until well combined.
  4. Unroll your two puff pastry discs. Use a fork to make several small holes all the way through the first pastry.
  5. Spread the almond cream evenly over the center of the pastry leaving about 2 inches of space from the edge.
  6. Place your lucky charm somewhere close to the outer edge and press it down into the filling.
  7. Place the second sheet of puff pastry over the cream pushing gently together the edges to seal them tight.
  8. Brush the whole surface with the beaten egg.
  9. With the tip of a sharp knife, gently draw criss-cross lines (without cutting it!) and pierce the pastry at their intersections to allow the steam to escape.
  10. Bake at 356°F for about 40 minutes or until golden brown.

Eat this deliciously cake with cider while still warm to enjoy the filling and the aromas at their best. La galette des rois, the only sociable cake that can make you feel like a king.

How to make Moringa/Drumstick/Murungakkai Sambar

Moringa Drumstick Murungakkai Sambar

Moringa is chock-full of nutrients but we don’t pay much attention to this miracle tree.

Moringa is also the botanical name (Moringa Oleifera) for drumstick. While it grows in most parts of India, it’s probably more ubiquitous in Southern India.
We call the drumstick leaves as Murungai Keerai  and the drumstick tree as Murungai maram in Tamil.
The world might have put Moringa on the pedestal as the newest and greatest superfood but across South India it has been an integral part of the diet for years.
Lately, Moringa supplements and energy bars are becoming fashionable. All the excitement is understandable: Moringa leaves and seed pods are packed with protein and vitamins.
The leaves, which taste a bit peppery, like arugula, are a good source of easily digestible protein as well as vitamins A and C, calcium and iron. The seed pods are also rich in protein and high in omega-3 fatty acids.
Recently, researchers around the world have taken a renewed interest in this hardy plant and its many nutritional benefits. And they’re learning that all that moringa I gorged on as a child might have been healthier than I ever realized.
Africans have also honoured it as a tree to “Never Die” and “Mother’s Milk”.

Sambar is a quintessential part of lunch in Tamil cuisine

Sambar is a very healthy dish, a complete meal in itself with vegetables and protein from dal.
Drumstick or murungakkai is the most favored vegetable in sambar in Tamilnadu. Drumstick is a very healthy and flavorful vegetable, often recommended in diet to increase iron. It lends a subtle yet fragrant flavour to the sambar. The juicy seeds taste like green beans but sweeter. And most often kids are encouraged to chew on the drumsticks to max out on the nutrients.

Easy & Quick Sambar Recipe, How to make Moringa/Drumstick/Murungakkai Sambar.
Ingredients for Moringa Sambar

  • Tuvar dal/pigeon pea lentils – 50g  pressure cooked until the dal becomes soft
  • Tamarind juice, extracted from a small lemon-sized ball of tamarind soaked in hot water
  • Drumstick- 2, chopped into finger-sized pieces
  • Tomato – 1, chopped
  • Turmeric powder – ¼ tsp
  • Sambar powder – 1 tsp
  • Salt to taste
  • Oil -2 tbsp
  • Onion – ½, sliced finely
  • Water – 1 cup
  • Water for pressure cooking the dal –  ratio 3 : 1

For the tempering

  • Oil – 1 tsp
  • Mustard seeds – ½  tsp
  • Fenugreek seeds (optional) – ¼ tsp
  • Asafoetida – a pinch
  • Curry leaves – few

For the garnishing

  • Coriander leaves

Instructions

  1. First soak the tamarind in  warm water. After 30 minutes, squeeze off the tamarind well, then filter the tamarind juice.
  2. Wash and chop the drumsticks.
  3. Rinse the tuvar dal thoroughly and drain out the water.
  4. Pressure cook the dal with water, turmeric powder and salt on medium flame for 2 to 3 whistles. The dal should become soft and mushy. Once the pressure settles down on its own, remove the lid, mash the dal to smooth using a wooden spoon and keep aside.
  5. Heat the oil in another saucepan, then allow to cook on a medium flame the onion for 30 seconds, and the tomato until it turns into a mushy texture while stirring occasionally.
  6. Add the choppped drumsticks, stir about 1 minute then add the sambar powder, mix well for another 1 minute. Add water and let it boil till the drumsticks are half cooked for 10 minutes.
  7. Now add the tamarind juice and salt and cook till the drumsticks become tender for another 10 minutes.
  8. Add the smooth boiled tuvar dal. If the consistency of sambar is thick, then add some water.
  9. Check if there is enough salt, if needed add more.
  10. Bring the sambar to boil. Meanwhile heat the oil in a small pan. Put the mustard seeds, once the seeds crackle turn the heat on low flame, then add fenugreek seeds, asafoetida powder and curry leaves.
  11. Pour the whole tempering in the boiling hot sambar. Mix well and close the lid so the flavors can infuse.
  12. Garnish with coriander leaves.

Serve your drumstick sambar with steamed rice, ghee, potato fry, small potato fry, raw banana fry, carrot curry etc. Add curd, pickle and your meal will be a complete and healthy one!

Tips

For faster cooking you can soak the lentils in water for 15 mins before cooking them.
Dont overcook the dal, as the taste of it diminishes.
Try to use tender drumsticks that contain more plump.
Pearl onions or small onions take the flavor of this drumstick sambar to another level

Health benefits

Drumstick tree botanically known as “Moringa Oleifera” offers many health benefits. Drumstick leaves are a storehouse of nutrients and antioxidants. It has approximately 90 nutrients and 46 natural antioxidants as well as anti-inflammatory compounds. It has all the essential amino acids needed for the body and is said to treat more than 300 diseases. No wonder it is called the “Miracle Tree”. Moringa has been found as a potent anti-diabetic and anticancer plant and several bio active compounds with significant anti tumor activity have been discovered from Moringa. It is also a good sources of minerals like calcium, iron, copper, manganese, zinc, selenium, and magnesium. It helps boost the immune system and increases breast milk production

You can find more informations here


How to Make Indian Milk Tea

With cooler weather coming, warmer beverages sound better every day, there’s nothing like a cup of indian milk tea to relax you.

 Indian Milk Tea

Simple and easy way to make your perfect cup of indian tea.

Ingredients for 1 cup

  • 100 mls low fat milk
  • 100 mls water + 2-3 tsp extra water
  • 4 lipton Yellow Label Tea Bags
  • 2 tsp sugar

Instructions

  1. Add the sugar in your tea cup and place the tea strainer on top.
  2. Cut out the tea bags and set aside the powdered tea leaf.
  3. Heat the milk and the water in a saucepan until you see bubbles on the sides. A thin layer of cream will form on the surface of the milk.
  4. Add the tea leaf powder in the center, thereby break the film of cream and allow the milk to bubble over.
  5. Stir till you get the desired color for your tea.
  6. Strain through a tea strainer from a good height right into the cup. The tea will become more bubbly.
  7. Then pour from the cup into a clean saucepan and then back into the cup. Perform this 3 times as high as possible. It improves the flavors of the tea.
Blue-eyed Indian Milk Tea-seller becomes social media sensation in India and Pakistan
Blue-eyed Tea-seller becomes social media sensation in India and Pakistan

Savor your silky & creamy indian milk tea hot with cookies/biscuits or some indian snacks!

Totally Her Cup of Indian Milk Tea: 26-Year-Old Indian ‘Chai Walli’ Is Australia’s Businesswoman of the Year
Totally Her Cup of Tea: 26-Year-Old Indian ‘Chai Walli’ Is Australia’s Businesswoman of the Year

Whether it’s a happy occasion or a difficult moment, tea is a sweet & spicy way of bringing people together.

first lady Michelle Obama meets with Melania Trump for tea in the yellow oval room of the white house
First Lady Michelle Obama meets with Melania Trump for tea in the yellow oval room of the white house


Health Benefits

Black tea has weight loss aiding abilities. It helps controlling blood sugar levels and curbs the appetite to a great extent.
Tea is associated with a lower risk of developing ovarian cancer.

You can find more informations here


How to make Saffron & Almond Milk

Saffron & Almond milk is a rejuvenating and flavourful drink which is served on various Indian occasions like weddings and festivals. Saffron & Almond milk is enriched in nutrients and very energetic. This is a very good recipe for kids as almonds are said to have properties to increase memory power.

Saffron & Almond Milk
Quick & Easy Saffron & Almond Milk that can be made at home

Ingredients for Saffron & Almond Milk

  • Full Cream Milk – 500 ml
  • Almonds – 5
  • Pistachios – 5 + (3 crushed for garnishing(Optional))
  • Cashews – 1
  • Cardamom – 2 (open and take out the seeds)
  • Saffron – 2 pinch
  • Sugar – 6 tsp (can be substituted for coconut sugar or honey)

Instructions

  1. Chop few pistachios and keep aside for final garnishing.
  2. Put all the ingredients except the sugar and saffron to the mixer and grind it until it becomes a fine powder.
  3. In a medium saucepan, bring the milk to a boil, add saffron and sugar.
  4. Reduce the heat to low, Keep stirring for about 3 minutes, in order to avoid sticking the milk at the bottom of saucepan.
  5. Add the powder to the milk and simmer on low heat for another 3 minutes until all the ingredients are well combined.
  6. Turn off the heat  and allow the drink to cool to the room temperature. You can either serve it warm or serve it chilled by keeping it in the refrigerator for 4 hours.
  7. Serve garnished with the thinly sliced pistachios and enjoy this healthy and tasty Saffron & Almond milk!

The result is a sumptuous beverage laced with warm spices that has nutty undertones and a delicate sweetness from the saffron and sugar.

Health benefits

  • Saffron has many medicinal properties, it is effective at treating mild to moderate depression, it also helps in asthma, sleeping habits and many more.
  • Almonds are super nuts for health. It is said that these crunchy and delicious nuts can help you lose weight, protect your heart, increase your energy and even improve your skin tone.
  • Pistachios can maintain the cholesterol level in the body and improve the overall health.
  • Milk provides calcium, phosphorous, magnesium and protein which are all essential for healthy bone growth and development of body.

All these ingredients makes the drink very rich and refreshing. This delicious & nourishing drink makes you forget that you are drinking milk!

HEALTH BENEFITS OF ALMONDS

Simple and healthy Vegetable Rava Upma

You are looking for something simple and healthy? Timeless and delicious? Vegetable Rava Upma is just the ticket for you. Take your senses for a gastronomical joy ride!

Vegetable Rava Upma

Semolina or popularly called rava in the Southern states of India, is cooked with much enthusiasm across the country. It is light on stomach, loaded with health benefits and absolutely delectable.

The tempering of mustard seeds, chillies, urad dal and curry leaves works miraculously in transforming the simple dish to a delightful treat.

Add some onions and chopped vegetables to the savory semolina upma, and you have a power-packed, as well as delicious, meal in a bowl!

Ingredients for Vegetable Rava Upma

  • 1 cup Rava (Semolina)
  • 2 cups Water
  • 2 Tbsp Oil
  • 1 medium-sized Onion (chopped)
  • ½ cup of frozen Green Peas
  • 1 medium Carrot, chopped
  • 5 Curry Leaves
  • ½ Green Chili, slitted
  • ½ tsp split Urad Dal
  • ½ tsp Mustard Seeds
  • ½ tsp Salt
  • ¼ tsp Turmeric Powder
  • ½ inch of fresh, peeled and shredded Ginger (If you don’t have, you can replace it by ¼ tsp of ginger garlic paste)

Instructions

  1. Dry-roast semolina (rava) until the color starts changing, then keep aside.
  2. In a large saucepan, heat the cooking oil. Add mustard seeds and wait for them to sputter. Reduce the flame, then add curry leaves, slit green chili, ginger and split urad dal.
  3. When the dal turn golden brown, add chopped onion and fry until it becomes translucent.
  4. Add the chopped vegetables, salt to taste, turmeric powder, mix well and sauté for 2-3 minutes.
  5. Add 2 cups of water to the vegetable mixture and let it come to a boil.
  6. Taste the water and check for salt.(if it is a bit salty, then it will become perfect after adding rava).
  7. Add roasted rava to boiling water slowly while stirring continuously the mixture to avoid lumps.
  8. Cover and cook on medium flame for 5 minutes. The rava is cooked when all the water is absorbed.

If you want the upma on tangy side, you can add lemon juice or yogurt towards the end.
And for that added crunch, spruce it up with a few cashew nuts or roasted peanuts and you’re good to go.

This tasty traditional breakfast dish can be a colourful, light and nutritious lunch or dinner.
It’s a 10-minutes flavorful snack. So easy to make and wonderful to experiment with!

The reason why upma is so important today

Health benefits

  1. It Digests Slowly: Your body digests upma slowly. This is an advantage as it will keep you full for long. So, you don’t need to snack on anything else.
  2. Good For Immunity: The vitamins present in wheat rava are good for your immunity. Mainly, Vitamin B and E in it fortify your immune system.
  3. Keeps You Energetic: Even health experts agree that upma can keep you energetic. Also, when you add enough vegetables to it, you can get some fibre content too.
  4. Good For Kidneys: The potassium content present in wheat rava is good for your kidneys. In fact, it enhances the function of your kidneys.
  5. Good For Your Heart: The nutrients present in wheat rava are heart healthy. Also, the selenium content in it is said to be good for your immune system.
  6. Vegetables: Generally onions are added to upma.You can also add green peas and any other vegetables to it. This helps you get lots of vitamins and minerals in your diet. This makes upma nutritious.
  7. Good For Bones: Minerals like magnesium, phosphorous and zinc present in wheat rava are good for your nervous system and bones too.
  8. Good Source Of Iron: As wheat rava is a good source of iron, it can prevent anemia. Also, it enhances your blood circulation.
  9. Nuts: You can add various types of nuts like ground nuts and cashew nuts in upma. This will make it tastier and of course, you can reap the health benefits of the nuts too.

Simple way to Store and Preserve Fresh Curry Leaves

Fresh Curry Leaves Stored

Just the aroma of curry leaves incites hunger.

Curry leaves, known as karuveppilai in tamil, are one of the common seasoning ingredient that is added to almost every dish to enhance its taste and flavour.

They are not related to curry powder, which is actually a blend of spices.

However, rather than eating this humble leaf, most of us just throw it away. But have you ever wondered if you have to throw this leaf then why did our mothers use this leaf to every food preparation?

Because besides rending a distinct flavour to the various dishes they are added to, the rich, glossy green leaves come packed with a bevy of health benefits.

Right from helping your heart to function in a better way to enlivening your hair and skin with vitality, Curry leaves have just the health boost you need.

Simple way to Store and Preserve fresh Curry Leaves

  1. Wash the leaves in running water and let them drain in a colander for 30 mins.
  2. Take out the sprigs from the stem but don’t remove the leaves!
  3. Put them on a large kitchen towel and gently pat them dry.
  4. Take a clean dry glass jar and store the curry leaf stalks in it.
  5. Keep the lid closed and store in the fridge.

From curing diabetes to digestive disorders, Curry leaves do more than just seasoning your food.

Thanks to being :

  • a source of proteins, amino acids, antioxidants, alkaloids and anti–inflammatory benefits.
  • packed with fibre, calcium, phosphorous, iron, vitamins C, A, B and E.Â.

Health Benefits

  • Diabetes: eating 10 fresh fully grown curry leaves every morning for three consecutive months will help keep hereditary diabetes at bay. It also cures diabetes that’s caused due to obesity, as the leaves have weight-reducing properties.
  • Kidney Disorders: The root of the plant is used for medicinal purposes. The juice of these leaves can be consumed to relieve kidney pain.
  • Premature Greying: Moderate intake of curry leaves helps prevent premature greying of the hair. The leaves can also be applied on the scalp and hair in the form of a paste.
  • Strengthening hair roots: Dry curry leaf powder mixed in oil can be applied to your hair with a quick massage. Doing these on a regular basis can improve hair growth and cure hairfall as well.
  • Anti-bacterial properties: Curry leaves helps fight against skin infections.
  • Eye Disorders: Curry leaf is a good source of vitamin A and hence provides protection against developing cataract.Prevent early development of cataract by using the fresh juice from curry leaves as an eye drop.
  • Digestive Disorders: Treat morning sickness and nausea by consuming fresh juice of curry leaves with lime juice and sugar. They are also useful in treating diarrhea, , gastrointestinal problems dysentery and as indigestion, excessive acid secretion, peptic ulcers and piles.
  • Cholesterol balance: Curry leaves are also known to reduce bad LDL cholesterol level. They protect one from heart disease—increasing the “good” cholesterol (HDL).
  • Anaemia: They are a rich source of iron and folic acid (which helps the body absorb iron) and thus counter anaemia.
  • Liver Disorders: They are known to help protect the liver. Preventing it from damage, and stimulating it to work better.
  • They are also believed to have cancer fighting properties.

I have rarely come across an ingredient that seems so miraculous. Which could also be why that in the absence of tulasi (basil) leaves, curry leaves are in fact used in ritualistic worship.

You can find more informations here

How to make Spinach Sambar

Spinach Sambar

Be it with idlis, dosas, vadais or rice, sambar is undoubtedly an indispensible part of South Indian cuisine.
Don’t wait for a wedding invitation to eat this sumptuous South Indian spinach sambar!

Easy & Quick Sambar Recipe, How to make Spinach Sambar.

Ingredients for Spinach Sambar

  • Tuvar dal/pigeon pea lentils – 50g  pressure cooked until the dal becomes soft
  • Tamarind juice, extracted from a small lemon-sized ball of tamarind soaked in hot water
  • Carrot – 1, grated
  • Tomato – 1, chopped
  • Spinach leaves
  • Zucchini – ½, chopped (also you can use the veggies of your choice)
  • Turmeric powder – ¼ tsp
  • Sambar powder – 1 tsp
  • Salt to taste
  • Oil -2 tbsp
  • Onion – ½, sliced finely
  • Water – 1 cup
  • Water for pressure cooking the dal –  ratio 3 : 1

For the tempering

  • Oil – 1 tsp
  • Mustard seeds – ½  tsp
  • Fenugreek seeds (optional) – ¼ tsp
  • Asafoetida – a pinch
  • Curry leaves – few

For the garnishing

  • Coriander leaves

Instructions

  1. First soak the tamarind in  warm water. After 30 minutes, squeeze off the tamarind well, then filter the tamarind juice.
  2. Whash and chop the veggies.
  3. Rinse the tuvar dal thoroughly and drain out the water.
  4. Pressure cook the dal with water, turmeric powder and salt on medium flame for 2 to 3 whistles. The dal should become soft and mushy. Once the pressure settles down on its own, remove the lid, mash the dal to smooth using a wooden spoon and keep aside.
  5. Heat the oil in the pressure cooker, then allow to cook on a medium flame the onion for 30 seconds, and the tomato until it turns into a mushy texture while stirring occasionally.
  6. Add all the veggies, stir about 1 minute then add the sambar powder, water mix well and let it boil.
  7. Now add the tamarind juice and salt. Pressure cook again for 1 whistle, turn off the heat and maintain the lid closed for about 5 minutes.
  8. Add the smooth boiled tuvar dal. If the consistency of sambar is thick, then add some water.
  9. Check if there is enough salt, if needed add more.
  10. Bring the sambar to boil. Meanwhile heat the oil in a small pan. Put the mustard seeds, once the seeds crackle turn the heat on low flame, then add fenugreek seeds, asafoetida powder and curry leaves.
  11. Pour the whole tempering in the boiling hot sambar. Mix well and close the lid so the flavors can infuse.
  12. Garnish with coriander leaves.

Serve the Spinach Sambar hot with steamed rice, idli, dosa or medu vadai.

Tips

For faster cooking you can soak the lentils in water for 15 mins before cooking them.
Dont overcook the dal, as the taste of it diminishes.
Usually the vegetables are not cooked in a pressure cooker but in another pan. Cooking the vegetables in the pressure cooker reduces the cooking time considerably and also preserves the nutrients of the vegetables.

Health benefits

It is low in glycemic index. A bowl of sambar has a GI of 53.6%, thereby helping you to keep your blood sugar level in check without compromising on the taste.

Sambar is loaded with proteins and fibre. A typical 200 gm serving of sambar provides about 8-10 gm of proteins from dal (+more depending on the vegetables used). Moreover, it also provides 2-3 gm of dietary fiber, which helps in the overall growth and development of muscles when taken with idlis, dosas or rice.

Sambar is used as natural laxative. It is due to the high water content and the presence of fibre.

Sambar is a healthy weight loss recipe. This is because, with loads of vegetables and spices.

Sambar is a not only a storehouse of nutrients but also packed with proteins and fibre. And what could be better than having idlis or dosas with sambar in the breakfast !

Homemade Ginger Garlic Paste

Homemade Ginger Garlic Paste

Nothing beats fresh homemade ginger garlic paste

What is ginger garlic paste?

Ginger and garlic are mainstays of indian cuisine. Instead of chopping them for every dish, blend them into a paste that you can spoon directly into the pan. It makes cooking quick and easy.

Ginger garlic paste is an essential in Indian cooking. It is added to almost all of the Non-vegetarian preperations and a few vegetarian dishes. It is often paired with onion, tomato, or green chillies in gravy preparations.It is often used in rice preparations like biryanis, pulao and curries.

Ingredients

Use the same amount of ginger and garlic (meaning 1:1 ratio)
100 grams freshly peeled Ginger
100 grams peeled Garlic
1 tbsp of vegetable oil

Instructions

  1. Wash the ginger very well. Pat it dry completely using kitchen towel or paper towel.  Then peel and chop it into rough cubes.
  2. Peel the garlic
  3. Combine the ginger and garlic in a food processor or blender.
  4. When grinding process is almost done add oil. It acts as a preservative.
    Pulse to blend until it makes a smooth paste.
  5. Store the homemade ginger garlic paste in a clean, dry and  air-tight glass jar in the refrigerator.
    That way the paste can last two or three weeks.

Health benefits

Ginger’s medicinal properties are impressively extensive, and include its ability to enhance immune function.It has been used for thousands of years as a remedy for a range of health issues, including colds, nausea, arthritis, migraines, and hypertension.

Garlic is high in a sulfur compound called Allicin, which is thought to bring most of the health benefits. Human studies have found garlic supplementation to be an effective treatment for reducing blood pressure in people with high blood pressure.

You can find more informations here

Tips

Be sure ginger is completely dry, after its washed. It is important that there should be no moisture.
Do not use water while grinding ginger and garlic.
Always use clean and dry container for storing.
Do not put the jar of ginger garlic paste on the side doors of refrigerator, instead of that find out the coldest possible area in your refrigerator and put always your homemade ginger garlic paste there.
When needed for the recipe, remove the jar from the fridge, take out required amount using clean and dry spoon. Close the jar and put it back in the fridge immediately. Do not let the jar sit at room temperature while you are cooking the dish.